Description
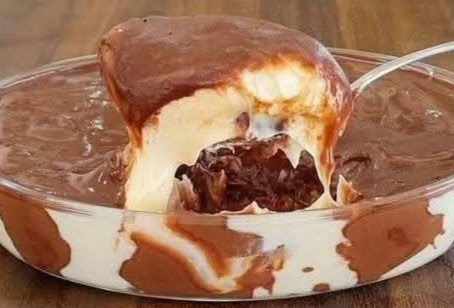
This is my go-to dessert when I want something rich, creamy, and effortless. Layers of smooth vanilla pudding and silky chocolate pudding swirl together over a biscuit base, creating a melt-in-your-mouth treat that’s always a hit with family. No fancy techniques, just simple ingredients and big flavor. Perfect for make-ahead dinners, potlucks, or when you need a quick sweet fix.
Ingredients
*For the Biscuit Base:*
– 200g / 7 oz digestive biscuits or Maria cookies, crushed
– 50g / 3.5 tbsp unsalted butter, melted
*For the Vanilla Layer:*
– 500ml / 2 cups whole milk
– 50g / ¼ cup granulated sugar
– 30g / ¼ cup cornstarch
– 1 tsp vanilla extract
– Pinch of salt
*For the Chocolate Layer:*
– 500ml / 2 cups whole milk
– 60g / ⅓ cup granulated sugar
– 30g / ¼ cup cornstarch
– 25g / 3 tbsp unsweetened cocoa powder
– 50g / 1.7 oz dark chocolate, chopped
– Pinch of salt
Instructions
1. *Prepare the Base*
Mix the crushed biscuits with melted butter until it resembles wet sand. Press firmly into the bottom of a 20cm / 8-inch glass dish. Place in the fridge for 10 minutes to set.
2. *Make the Vanilla Pudding*
In a saucepan, whisk together milk, sugar, cornstarch, vanilla, and salt until no lumps remain. Cook over medium heat, stirring constantly, until the mixture thickens to a smooth, creamy pudding consistency, about 5-7 minutes. Remove from heat and pour over the chilled biscuit base. Smooth the surface and let it cool for 10 minutes.
3. *Make the Chocolate Pudding*
In a clean saucepan, whisk milk, sugar, cornstarch, cocoa powder, and salt. Cook over medium heat, stirring constantly, until thick and glossy, about 5-7 minutes. Remove from heat, add chopped chocolate, and stir until melted and silky.
4. *Assemble and Chill*
Gently pour the chocolate pudding over the vanilla layer. Use a spoon to create swirls if you want a marbled effect, or leave it as clean layers. Cover with plastic wrap, touching the surface to prevent a skin from forming. Refrigerate for at least 3 hours, or until fully set.
5. *Serve*
Scoop into bowls or cut into squares. Serve chilled.
Notes & Tips
– *Milk*: Whole milk gives the creamiest result. You can use 2% milk, but avoid skim for this recipe.
– *Cornstarch*: Don’t reduce the cornstarch or the pudding won’t set properly. Whisk well at the start to avoid lumps.
– *Chocolate*: Use good quality dark chocolate for a deeper flavor. Milk chocolate works if you prefer it sweeter.
– *Make-Ahead*: This dessert keeps well in the fridge for up to 3 days. It’s even better on day 2.
– *Variations*: Add a layer of whipped cream on top, or sprinkle with chocolate shavings and chopped nuts before serving.
– *Serving Tip*: Use a hot spoon dipped in warm water for clean scoops without breaking the layers.
Serving Suggestion
Serve this dessert cold with a cup of coffee or tea. It’s rich enough that small portions go a long way. For a dinner party, garnish with a few fresh berries or mint leaves to make it look extra special.
Want me to adjust this for a no-bake version or make it eggless?