
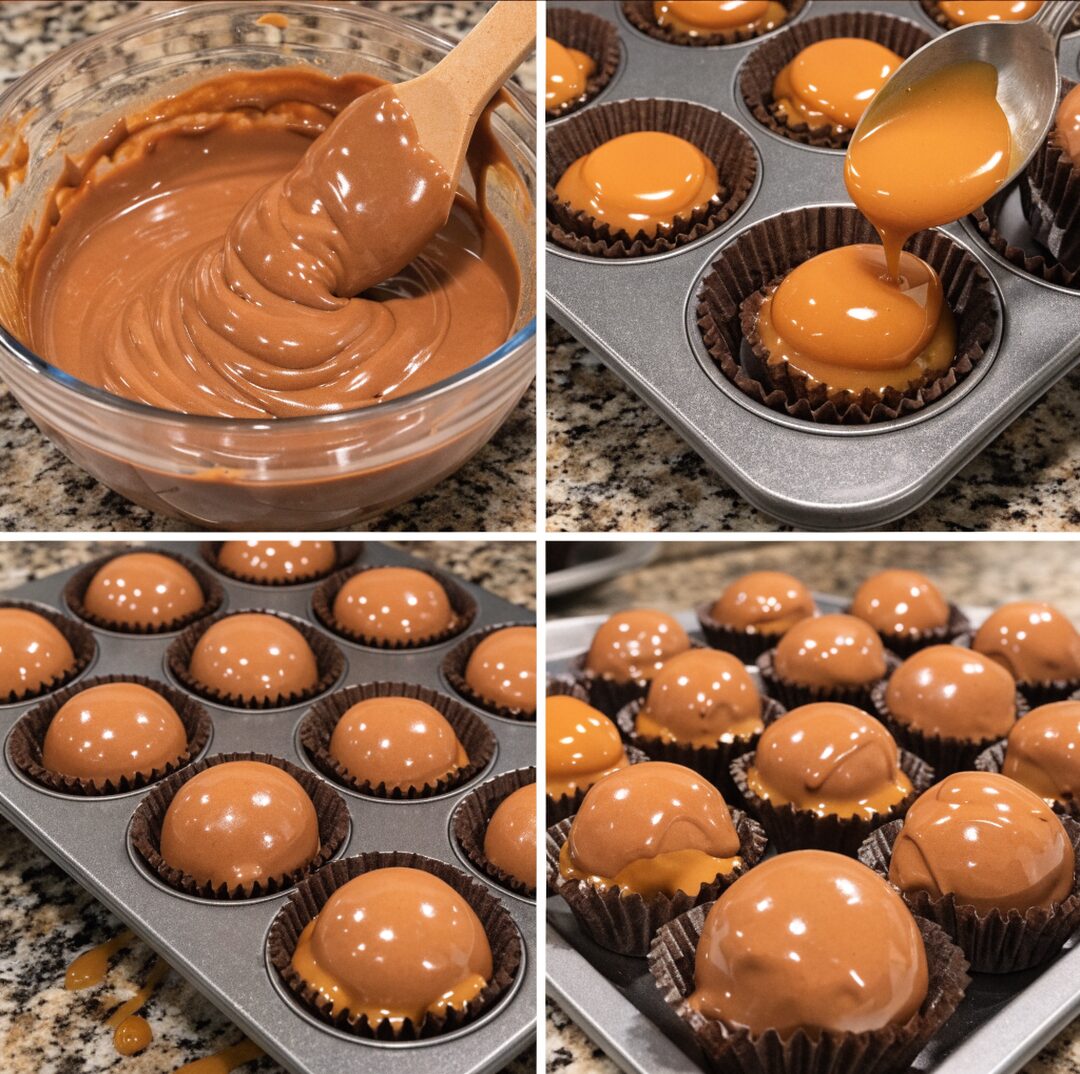
Decadent Caramel-Filled Chocolate Cups: A Luxurious Treat for Any Occasion
Indulging in caramel-filled chocolate cups is one of life’s sweetest pleasures. These delightful treats combine rich, velvety chocolate with a luscious caramel center, creating an experience that is reminiscent of gourmet chocolates. Whether you’re celebrating a special occasion or simply treating yourself, this comprehensive guide covers everything you need to know about making decadent caramel-filled chocolate cups at home.
The Allure of Homemade Caramel-Filled Chocolate Cups
Why is everyone raving about homemade caramel chocolate cups? The answer lies in the quality and flavor that you can achieve when you make them yourself. Store-bought candies often contain preservatives and artificial flavors, while homemade versions allow you to control the ingredients for a truly authentic taste.
- Quality ingredients: Use premium chocolate and natural caramel for the best flavor.
- Customizability: Add your favorite flavors, nuts, or toppings to personalize your chocolates.
- Gift-worthy: These treats make perfect gifts for friends and family, especially when packaged beautifully.
Understanding the Ingredients
To create the perfect caramel-filled chocolate cups, you’ll need a selection of high-quality ingredients. Here’s what you’ll need:
- Chocolate: Choose high-quality dark chocolate or milk chocolate based on your personal preference. The cocoa percentage can range from 55% to 70% for a rich flavor.
- Heavy cream: Essential for making the caramel sauce silky and smooth.
- Granulated sugar: Needed for the caramel; avoid using brown sugar as it can alter the taste.
- Butter: Use unsalted butter to create a rich and creamy caramel sauce.
- Salt: A pinch of sea salt enhances the flavor of both the chocolate and caramel.
Step-by-Step Guide to Making Caramel-Filled Chocolate Cups
Creating the Chocolate Shells
Start by making the chocolate shells, which will form the outer coating of your decadent treats. Follow these simple steps:
- Chop the chocolate into small pieces to ensure even melting.
- Using a microwave or a double boiler, melt two-thirds of the chocolate until smooth.
- Remove from heat and stir in the remaining chocolate until fully melted and tempered.
- Using a spoon or a brush, coat the inside of silicone molds or muffin cups, ensuring an even layer. Refrigerate until set.
Making the Caramel Filling
Now that your chocolate shells are ready, it’s time to prepare the caramel filling:
- In a saucepan over medium heat, combine the granulated sugar and a bit of water. Stir until the sugar dissolves.
- Continue cooking without stirring until the mixture turns a golden amber color. Be cautious not to burn it.
- Once it reaches the desired color, carefully add the heavy cream and butter while stirring until fully combined.
- Allow the caramel to cool slightly before pouring it into your chocolate shells, filling them just to the top.
Finishing Touches
To complete your decadent caramel-filled chocolate cups, follow these steps:
- Reheat any remaining chocolate and pour it over the caramel filling to seal it inside the cups.
- Use a spatula to smooth the chocolate over the tops, ensuring there are no gaps.
- Return the filled molds to the refrigerator until the chocolate has completely hardened.
- Once firm, gently remove the cups from the molds and store them in an airtight container.
Flavor Variations for Your Chocolate Cups
One of the best parts about making caramel-filled chocolate cups is the ability to customize flavors to your liking. Here are some delicious variations to try:
- Sea Salt Caramel: Sprinkle a pinch of sea salt on top of the caramel filling before sealing with chocolate.
- Nutty Delight: Add finely chopped nuts like pecans or hazelnuts to the caramel for an added crunch.
- Spiced Chocolate: Mix in a dash of cinnamon or chili powder to the melted chocolate for a unique flavor profile.
- Fruit Infusion: Incorporate fruit purees into the caramel for a fruity twist; popular options include raspberry or orange zest.
Serving and Storing Your Decadent Chocolate Cups
Presentation Ideas
To make your homemade chocolate cups even more enticing, consider creative presentation ideas:
- Arrange them on a beautiful platter or cake stand for an eye-catching dessert table.
- Wrap individual cups in decorative cellophane with a ribbon for gifts or party favors.
- Serve them alongside fresh fruit or a scoop of ice cream for a delightful dessert pairing.
Proper Storage Techniques
Store your caramel-filled chocolate cups properly to maintain their freshness:
- Keep them in an airtight container at room temperature for up to two weeks.
- If it’s warm, consider refrigerating them, but allow them to come to room temperature before serving to preserve flavor and texture.
Conclusion: A Beautifully Decadent Delight
Homemade caramel-filled chocolate cups not only satisfy your sweet tooth but also offer a rewarding baking experience. With a little patience and the right techniques, you can create these exquisite treats that are sure to impress family and friends. Experiment with flavors and fillings to make them uniquely yours, whether for a special occasion or just because. Embrace your inner chocolatier and enjoy the decadence of these delicious creations!